Showing posts with label watercolour. Show all posts

01 November, 2020

Cat Lovers Hop Project #5 Watercolour Snarky Cat Card set


Hello Lovelies! 


Due to the limit of 5 projects per person on the main hop link up, many of mine will only be shared here and on my socials, so please keep checking back to get as many chances for the giveaway as possible!  I will also keep making AFTER the official Hop finishes, so please keep on checking back!

See, I promised you a card project before the end of the official hop (I'm cutting it really fine, though!) It's not the end for me!  I still have things I want to make which will could towards entries for the giveaway!

I've had the idea for a set of snarky cat cards like these for a while.  I used the Tim Holtz Snarky Cat stamp set, but I wanted to give some exercise to all my Dyan Reaveley snarky phrase sets too. 
 
These aren't for everyone,  but two of my closest friends are my crafty, snarky, coffee drinking besties and I know they'd have a laugh and not take it personally!

The Distress Ink watercolour is where is all fell down a bit.  The first one (red and orange) was more or less what I had in mind, except then they started to turn all monochromatic!  I'll be honest that I was still feeling pretty terrible so it wasn't going to be my best work no matter how you look at it. 

 
Once the watercolour was dry, I stamped the cats and sentiments, added a piece of fun foam a bit smaller than the card front then added the sequins.  Glue Dots are ideal for helping even out warped paper and giving extra hold where it might pull away from the card base.  
 
 
And sequins with wet glue and violently shaking hands as mine were today is a recipe for disaster!  Thanks, Columbus Trading!
 
 
I'm also not digging the sequins on some of them.  The placement of the stamp and sentiment on some doesn't help either, but overall I'm pleased given the circumstances! 
 
  
The hand shakes also explain the terrible photography! Soz!  


🎨 As I mentioned before, I'm going to keep making past the official end of the Hop on 31st (US Time) so keep coming back for more posts to comment on and get more entries!  There may be more Kitty fashions in the coming days 😜 and hopefully some card projects starting later today/tonight!

Snarky Cat Card Set

 Giveaway Prizes

🐱 Update! Since my first project (the cat masks) caused so much excitement, the three winners of the physical prizes can pick a cat fabric and I will make a mask to go with their prize (if they would like one).

Please understand that I can't do it for the electronic gift card prize, since it would mean shipping costs and the value of the gift card takes into account that I don't have to spend money on shipping.  Thanks so much!

MFT "Purr-Fect Friends" Stamp Set


Jane Davenport "Purr-fect Cat" Stamp Set


Cat Embellie pack 

with stickers, clips and half of the Echo Park "I Love My Cat" paper pad 


"Max's Choice" Bonus Prize

A gift card to the crafty store of your choice to the value of $20USD (or equivalent in your currency) to the closest denomination of card available.


Giveaway Rules

πŸ“Œ I have three items (and a bonus fourth prize) to give away (pictured below) and I'll pull three names for the first three prizes.

πŸ“ŒFor the  fourth "bonus" prize: it will go to someone who has entered the main blog hop (please let me know your project numbers if you would like to be considered.  You can wait til the blog hop is over (but before the close of the giveaway) to do this since the order changes sometimes.)

πŸ“Œ The first name drawn gets first choice, second name gets second choice and so on.  Bonus prize will be TallCraftyDude's favourite project!

πŸ“Œ This Giveaway is NOT SPONSORED.  I purchased the prizes especially for this giveaway.  This year I picked stuff other than just stamp sets to mix it up a bit


What Do You Have to Do?

You will receive an entry (or entries) for each of the following.  You absolutely don't have to do everything - just how ever many you like.

If you have previously followed my socials then these are already counted for you!  (unfollowers will not be counted)
πŸ“Œ The giveaway will remain open until 11:59PM AEDT on Friday 6 November.   Please visit THIS SITE to calculate in your own timezone
πŸ“Œ The winner will be drawn on Monday 9 November so PLEASE CHECK BACK HERE
❗If the winner and I can't make contact by Monday 16 November, I will have to draw a new winner since I need to get these prizes out all together.
❗Please try to email me at alex@pinkcraftymama.com This really is the easiest way for me to get in touch with you since not all blogger profiles have an email attached and if you JUST leave comments, I have no other place to search for you.

So...what do you have to do to get entries?

🐈 Follow this blog - 3 entries (in the left sidebar)
🐈 Subscribe to my YouTube Channel - 3 entries
🐈 Follow me on Facebook - 2 entries
🐈 Follow me on Instagram - 1 entry
🐈 Comment (once per day per person) on a project post between now and the close of the giveaway - 1 entry per post.  Index page with links to all my projects

Please don't hesitate to  email me with any questions at alex@pinkcraftymama.com

If you're entering the giveaway, comment below and tell me...is your car a fussy eater?  (or a cat you know if you don't have one) Or anything else if this doesn't grab you.
 

* ⬅⬅⬅ Acronyms and strange terms in left sidebar!  
 
Love and stay safe,
 

13 July, 2020

Stick it Down DT July Layout using FLHK kit

Hello Lovelies

I'm not sure whether I've mentioned here on the blog that I'm joining the crew over at Stick It Down!  I love using scrapbook sketches so I was pretty excited about playing with these girls!


I'm using my July For The Love Of Homemade Kits supplies to put this layout together.  You can find more on that in the description box of my video.

The sketch was a bit different for me as I mention in my process video (scroll down!).  The titles placement and embellies on just one part of the page forced me (most willingly!) out of my comfort zone!

Here's the link to July's Challenge:

This one is packed with dimensional embellies of all sorts and to adhere anything (especially anything requiring some extra strength) to mixed media calls for Permanent Glue Dots! 😍😍😍

If you watch the video and compare the finished layout there to the still photos, you may notice I moved all the tiniest enamel stars and lightning bolts.  πŸ™ˆπŸ™ˆπŸ™ˆ

While I am happier with them after the change, this page one one that took on a life of its own and I'm not sure how pleased I am with it. 

It's definitely not what I pictured in my head, but the crazy energy definitely reflects the story of two crazy energetic little girls who would barely stand still long enough to pose for a couple of photos!

Journaling

Close ups for your reading pleasure as always (if you can decipher my writing! 😳)


Embellies


YouTube Process Video


Wonder Woman & Super Girl


Love, and STICK IT DOWN!


15 January, 2020

Arty Divas DT - 14 January


Hi Lovelies!

Today is Challenge 13 at Arty Divas.  This is a FORTNIGHTLY "anything goes" (any type of project and any theme) challenge with a design team who makes projects showcasing the sponsor who often offers PRIZES!

This week's sponsor is TandiArt
TandiArt's Etsy Shop - https://www.etsy.com/uk/shop/TandiArt
Prize:


Each of the Design Team members received a different printable element.  This is something I'm not really used to working with.  The first thing I thought of was to place the fairy riding her unicorn and the small kaleidoscope of butterflies would be perfect for some little girl friendly cards with general sentiments.  My sister always needs these on hand having 2 little girls of her own so this one (along with a few others will go to her.  I only managed to finish one for this assignment).

When images have pre-printed textural elements such a mixed media or stitches or staples, they always look more at home by adding more (or if you're of the LOL cat and/or Shimelle persuasion, that would be MOAR!)

Now MOAR I can do, although for me, these were not as MOAR as usual.

I was keen to road test some new hot pressed watercolour paper (and I love it!!) and started by adding an iridescent paste by Vicki Boutin through a star stencil.  After that was dry, I dribbled some Shimmerz paint because I didn't want it too opaque and I wanted more sparkle and shimmer!!


Once that was dry, I splattered gold mist then stamped my sentiment with Archival ink THEN added my cut out elements adhered with foam to pop them up.

Even though this heavy duty watercolour paper didn't warp a lot, I still used Permanent Glue Dots to adhere the card front to the base.

Just a few sparkly gems to finish and it has everything I could have wanted when I was 6!


Hooray 


 Be sure to see what the other girls have made and enter the challenge!

Love, and shimmery kisses!


06 November, 2019

TTCRD DT 5 Nov and Coffee Lovers Hop Project 2


Hi Lovelies!


Today is challenge day for Design Team B for the Through The Craft Room Door Challenge.  This is a WEEKLY "anything goes" (any type of project and any theme) challenge with 2 design teams who alternate weeks to make projects showcasing the sponsor who often offers PRIZES!

This week we have a free choice of image, so I continued with my Distress Ink and Ink Road stamps.  Unlike the previous project when I used the "packaging technique" I used a brush and was much happier.

The ink looks neon in the pictures, but it really isn't!

In addition to "Mug Life", I also used two other Ink Road stamp sets - "Boymom" and "The Struggle is Real" for the sentiments.  In both cases each sentiment was a single stamp, but using a craft knife I cut each one so I could use part of the sentiment above the image and part below.  If I were to see myself only doing this occasionally, I'd just mask it, but I thought the stamps would be more versatile cut since I could mix them up with other stamps.

I didn't use any ink splatter on these - just clear sequins and adhered the watercoloured panels onto the card bases with plenty of foam tape to keep it from puling away and smooth out any warping.

These cards will also make up Project 2 for the Fall/Winter Coffee Lovers Blog Hop

I Run on Coffee and Chaos


I Can't Emphasize this enough: COFFEE!!!


OK now to the giveaway part:

 
Giveaway CLOSED
πŸ“Œ I have three items (and a bonus fourth prize) to give away (pictured below) and I'll pull three names for the first three prizes.
πŸ“ŒFor the  fourth "bonus" prize: it will go to someone who has entered the main blog hop (please let me know your project numbers if you would like to be considered.  You can wait til the blog hop is over to do this since they change sometimes.)
πŸ“Œ The first name drawn gets first choice, second name gets second choice and so on.  Bonus prize will be TallCraftyDude's favourite project!
πŸ“Œ This Giveaway is NOT SPONSORED.  I purchased the prizes especially for this giveaway.  This year I picked stuff other than just stamp sets to mix it up a bit!  In the even the items I purchased are on back order, I'll purchase something similar in their place and update the list below. Thanks for understanding!

The prizes you get to pick from are:

This pair of embossing folders - "On the Go" by Tim Holtz and "Coffee Stains" by Creative Expressions


Framelits Die & Stamp Set By Crafty Chica for Sizzix called "Mi Cafecito Mi Amor"


Coffeesaurus Stamp Set By Gerda Steiner


Lastly, the bonus prize will be a pack containing a 6x6 "Coffee" paper pad by Echo Park and some coffee themed embellishments.  This prize will be awarded to TallCraftyDude's favourite project so PLEASE LET ME KNOW WHAT NUMBERS IN THE MAIN HOP YOUR PROJECTS ARE IF YOU WISH TO BE CONSIDERED FOR THIS PRIZE!  THANK YOU SO MUCH!


You will receive an entry (or entries) for each of the following.  You absolutely don't have to do everything - just how ever many you like.

If you have previously followed my socials then these are already counted for you!  (unfollowers will not be counted)
πŸ“Œ The giveaway will remain open until 11:59PM AEDT on Sunday 10 November.  Please visit THIS SITE to calculate in your own timezone
πŸ“Œ The winners will be drawn randomly on Tues 12 Nov so PLEASE CHECK BACK HERE
❗If the winner and I can't make contact by Tues 19 Nov, I will have to draw a new winner since I need to get these prizes out all together.
❗Please try to email me at alex@pinkcraftymama.com This really is the easiest way for me to get in touch with you since not all blogger profiles have an email attached and if you JUST leave comments, I have no other place to search for you.

So...what do you have to do to get entries?
🍡Subscribe to my YouTube channel - 3 entries
https://www.youtube.com/user/PinkCraftyMamaAlex
🍡 Follow this blog - 3 entries (in the left sidebar)
🍡 Follow me on Facebook - 2 entries
🍡 Follow me on Instagram - 1 entry
🍡 Comment (once per day per person) on a post between now and the close of the giveaway - 1 entry per post

I don't yet know how many makes I'll have done between now and then, but it will be at least three.  The more love from you guys the better the chances of me getting crafty which gives you more chances to enter.  I may continue with extra "unofficial" projects after the Hop actually ends, so be sure to keep checking back here since you get an entry for commenting!


Click here for Project 1

So today...if you want to leave a comment, tell me whether drink any other caffeinated drinks besides tea or coffee?  (or anything else if this doesn't grab you) and please don't hesitate to  email me with any questions at alex@pinkcraftymama.com


* ⬅⬅⬅ Acronyms and strange terms in left sidebar! 

Love and copious cups of coffee!


13 August, 2019

TTCRD DT Project 13 July

Hi Lovelies!

Today is challenge day for Design Team B for the Through The Craft Room Door Challenge.  This is a WEEKLY "anything goes" (any type of project and any theme) challenge with 2 design teams who alternate weeks to make projects showcasing the sponsor who often offers PRIZES!

This week's sponsor is TTCRD with a Beach Theme.
Prize: $5 Amazon gift card

So...what's the fist thing that springs ti mind when you think beach?  Naturally my rather warped imagination jumps straight to two stamps sets ("Shark Bites" from Newton's Nook and "Killer Messages" by Hero Arts) and a set of dies ("Paper Layering Shark" from Hero Arts)...of sharks.

I did promise nothing gruesome so it wasn't as fun as it could be, but I made the best of it.  This was one of those times when what's in my head didn't translate to paper.  Again.

I wanted a beach scene with a fin, but when you open a partial flap, it shows what's REALLY under the water.  I didn't really have much in the way of beachy stuff, so I kept it simple with watercolouring using Distress Inks.  I figured I had to have some stickers with beachy stuff SOMEwhere and Amy Tangerine came through with some palm trees from the "American Crafts Designer Sticker Books',

After stamping, painting and cutting out the sharks, I looked at the silhouettes of the swimmers from the set of dies.  I thought about placing them in the same spot on the front and the inside of the card then use that great sentiment which makes me laugh every time.


Not being one who knows when to stop, I stamped waves on the front of the card and then some schools of fish (one of which is slightly messed up! 😳)

While I like the idea, I definitely don't quite love how it actually turned out.  I would have liked stiffer watercolour paper, but it needs to be hot pressed so I can stamp on it.

Friends til the Inevitable End

Front of card


Friends til the Inevitable End

Inside of Card

That's all for now and please head on over to TTCRD and enter a project in the challenge,  It doesn't have to be beach themed.

Love and snarky sharky sentiments

30 July, 2019

TTCRD 30 July DT Project

Hi Lovelies!

Today is challenge day for Design Team B for the Through The Craft Room Door Challenge.  This is a WEEKLY "anything goes" (any type of project and any theme) challenge with 2 design teams who alternate weeks to make projects showcasing the sponsor who often offers PRIZES!

This week's sponsor is Anne's Digital Arts.
Prize: Three digital Images

This week I was wondering aloud (OK that's nothing new) which image to use (out of the three we were given to choose from) and SmallCraftyDude was listening.  I have bird phobia so that's one eliminated and so I just decided to go with the basket of violets, bracing myself for a LOT of figuring out shadows to make the colouring realistic.

SCD asked me what the third choice was and when I told him it was a fence, he found it rather funny (kids, hey?) and started coming up with all sorts of puns.  I did what any no-nonsense PinkCraftyMama does in situations like these.  I told him "#ChallengeAccepted" πŸ’ͺ


What he didn't know when I said this was that I knew exactly what I'd do and hoped it would work.

I'm sure I've talked about being a Janeite here before (it's an actual thing, I promise!) and some of you may recognize the excepts of text from Pride and Prejudice!  The 1995 BBC adaptation dramatises this scene perfectly with just a touch of dramatic license.


I typed out the most relevant lines of text above the image and printed on the back of some watercolour paper.  Watercolour was going to look authentic (unlike the direction of my light and shade upon reviewing it 😁🀦) and I went with Derwent Inktense pencils for a couple of reasons.  Firstly, pencils are great for getting in small areas and secondly, they're actually ink so wont react again with water if they get wet after they've already dried.

I needed to use a fairly strong adhesive to keep watercoloured paper flat (even after it was dry and weighted down a bit) since from experience it seems to pull away from the card base and my personal preference for that are Permanent Glue Dots.  The ones in the blue dispenser make it fast and easy.

I kept it simple (I KNOW!!) and added just a hint of gold ink splatter.  Lizzy isn't ostentatious but she has taste so just a little seemed OK. 


Love and all things Jane,

23 April, 2019

TTCRD 23 April DT Project - Stamp On It


Hi lovelies!  Today is challenge day for Design Team B for the Through The Craft Room Door Challenge.  This is a WEEKLY "anything goes" (any type of project and any theme) challenge with 2 design teams who alternate weeks to make projects showcasing the sponsor who often offers PRIZES!


This week's sponsor is a company called Stamp On It.  Here is a little bit about them:

"Stamp On It had it's humble beginnings in Holland MI 25+ years ago.... started out as a "home" business, soon became a storefront on the north side of Holland, grew to a 2nd store front in Grand Rapids, before closing the Holland store and enlarging the Grand Rapids one!  We began doing small craft shows years ago, slowly adding rubber stamp conventions to our schedule, expanding to almost full time shows on the road before making the decision in the fall of 2009 to either close or sell the store.  Before we were able to close the store, one of our employees voiced her desire to purchase the store!  Long story short, we "sealed" the deal by the end of 2009 and became pretty much full-time rubber stamp convention vendors on the road.

Stamp on it are offering the winner  3 Digital Images from their store!

When I picked my image, I already had some feint rumblings of an idea in my head.  I should have known better than to let it inspire a false sense of confidence! πŸ™ˆπŸ™ˆπŸ™ˆ

So shall I tell you about today's misadventures craft process?  🀣🀣🀣.  I'm telling you it's every,single.time.  You get to the point when you have to laugh or cry and I'd rather not cry over something I enjoy!

Aaaanyway...since I had a vague idea how I wanted the finished card to look, I opened up the file to resize it and print and since it wasn't doing what I wanted, I thought I'd try opening it in Silhouette Studio and that was much better,

Not only that, but it meant I could use the machine to cut it out.  So what does one do when she decides she wants the paint palette in a woodgrain, but the paint blobs in white so I could give them a bold colour? πŸ€”

To cut a long story short, the "print and cut" feature hated the woodgrain paper and the paint blobs came out OK, but the brushes were too thin at that size.

It was also the time that Australian stores started getting the We R Memory Keepers Foil Quill for cutting machines so when I couldn't get the card front to look balanced, adding some faux stitching along the diagonal helped.  The good thing is that both the laser printer and the foiling can tolerate pretty much all types of paint and ink.  The down side is that the black foil and laser printer look basically the same! πŸ˜‚ I had hoped to see a shinier finish on the foil, but never mind!  You can sort of see it in some of the photos below.

More on the Foil Quill another day!

I placed the palette as a template to get the approximate position of the paint streaks.  Removable Glue Dots performed beautifully once again!  πŸ‘πŸ‘πŸ‘

The paint didn't turn out EXACTLY how I planned either, but still OK.


While all that was drying, I coloured the paint blobs from white cardstock with Copic markers. Colouring over the woodgrain paper still shows some of the wood pattern through the ink.  This is fine for where I wanted the paint to look smeared or spread on the palette, but not the blobs themselves.

They were so tiny that there was no way any shading would happen.  I did, however, colour the brushes straight over the woodgrain being darker colours.  Finally something went right! πŸ˜‚

I covered the blobs with a thick layer of glossy accents and a thinner layer over the brush handles.   More sitting and watching paint (and glue!) dry!

At this point I felt something was missing.  As I went to assemble the bits on the front, I realised what it was - I had forgotten to foil the sentiment! 😱😱😱

I had even figured out how to fill in a font much more quickly than the "old way" of messing about with offsets and things.  🀦


Out comes the Silhouette. Again.  Out come the quills.  Again.  Cutting foil and heating up quills.  Again. Initially it looked as though the size was going to be OK, buuuut we had a Goldilocks situation on our hands and it was tooooo big. 😫😫😫

I simply couldn't face yet another attempt at foiling, so when technology fails, I did what any sensible girl does and went old school.  I pulled out my grandma's old Olivetti from the 1960s!  I love the imperfect look of old typewriters!

The only foiled bit of the sentiment I kept was the world "colour".

Shimelle's "Box of Crayons" 6x6 pad had some great rainbow and colour/art inspired patterns.  The pencils in this design give a nod to the wooden paint palette!
 
I found my AB faceted gems from the Ink Road and put them in a safe place about a day or so before I needed them,  Then promptly forgot where that was...and eventually after much angst located them again!  πŸ™Œ

Permanent Glue Dots were essential to adhere watercolour card fronts to card bases in order to have enough strength to stop the slightly warped paper from pulling away from the card base.  I doubled up the same dots for the smallest hint of dimension to the paint palette.  The sentiment was put up on foam and my Mini Glue Dots for those pesky gems are super strong and take their weight with ease.

You Add Colour To My Life


 Thanks for sticking with me and I hope you find time to enter this challenge!

I'm also entering this card in the following challenges:

The Crafty Addicts Challenge 59
Crafts Galore Encore Challenge 62
Creatalicious Challenge #158
Artistic Inspirations Challenge #214
Crafty Catz Challenge #458
Make My Monday #94 Diamonds
(hope my blingy AB gems count!)
Simon Says Monday: Going Around in Circles
(hope my pattern paper counts!)

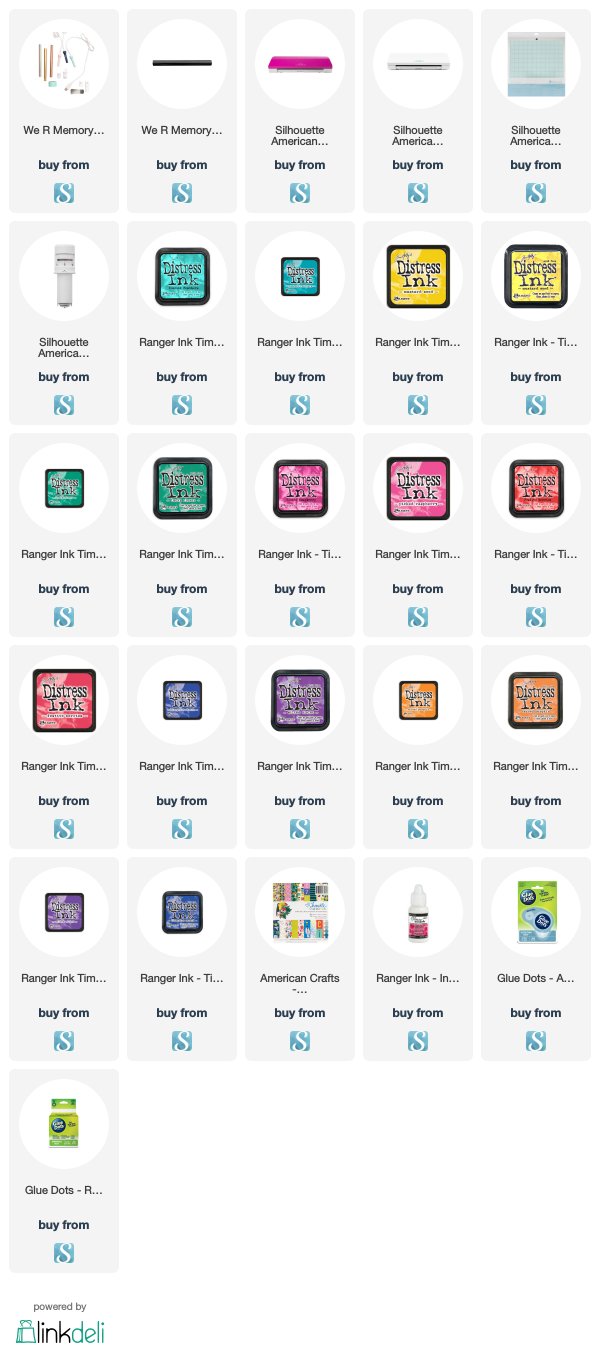
Supplies:

The products I used (or similar) are listed below:
This post may contain affiliate links.  By clicking on the items or making a purchase (at NO additional cost to you), you help support this site, so a big, pink THANK YOU! 
Please rest assured I only recommend products I personally use and love!


Love, and use AAAALL the colours!