20 June, 2019

Design Team Post for Embellish With Flair (17 June)

Hello Lovelies!
(giveaway now closed)

I'm here with the next installment of my Lost Mojo (or Finding Inspiration) series that I've been writing for the Embellish With Flair blog!  If you missed the first installments, you can find them here:
Part 1
Part 2
Part 3

Today we continue to look for inspiration in work by others.  The natural progression from scraplifting would probably be a sketch, but there is something a little in between.  I'm talking about CLASSES.  Classes offered by other crafters.  These can be either face-to-face or online.

I love online classes myself as they can be worked through at your own pace and access is usually life long.  I regularly sign up for classes by other crafters.  BUT WHY?? I hear you ask! You TEACH classes, so why TAKE classes?? ๐Ÿค”

Well everyone's style is different.  I believe that you never stop learning and if you don't try something new, you'll never know whether it's "your thing" or not.  Even the most well known crafters or artists can misplace their mojo for a time, and taking a class can reignite it (not to mention supporting fellow artists).

Today's layout takes inspiration from Lesson One from a class I recently signed up for called "A Touch of Whimsy" by my dear friend Sara.  Before you ask, no I didn't sign up JUST because she's my friend!  Her style is VERY different to mine and I love what she makes, but it's definitely out of my comfort zone!

Like me, Sara is both a cardmaker and scrapbooker and I definitely think you can apply the techniques in the class to cards as well...and...I think I'll do exactly that, so watch this space! ๐Ÿ˜‰๐Ÿ˜‰๐Ÿ˜‰

I HIGHLY recommend you check out the class.  It's excellent value at only $7USD, self paced so there are no deadlines and you also get access to a Facebook group which is really useful for thrashing out ideas and sharing your work.

๐Ÿ’กTip: Getting out of your comfort zone could be just what you need to get that mojo back!

I figured I'd better practice what I preach and since the last layout was a scraplift of Shimelle's (and I've taken MANY of her classes) which is very much within my comfort zone, I should probably show you something different!

One thing Shimelle does say about scraplifting (or trying something quite different) is that you still want to make it look like YOU made it when someone flips through the pages of your album. 

As a general rule.  if you've never taken an online class before, it's totally OK (and usually encouraged!) to share what you make online and across the socials.  What's NOT OK is to share the actual videos, PDFs and images of the artist's layouts.  This is why I can't show you Sara's actual layout.  You may know her as Sara Scraps across the socials, but she put this little SNEAKY PEEK on her Insta so you kinda get an idea what it's about.

❓What do you think of when you hear the word "whimsy"?  Go ahead and tell me your thoughts in the comments.

My thoughts are:
Organic shapes rather than geometric
Curves vs sharp angles
Butterflies
Flowers
Hearts
Clouds and floaty stuff
Unicorns, rainbows, dragons

Sara's first lesson in the class focuses on hand stitching or alternatives if you don't like to stitch.  As soon as I saw this I knew EXACTLY which photos and story I wanted to use.  I had set them aside for a layout I DID plan to hand stitch!!  What I hadn't planned on was having to SKETCH my stitching lines! ๐Ÿ˜ฌ

Plan A was to ask my SmallCraftyDude to help, but he refused point blank upon learning I required hearts.  ๐Ÿ™„

Plan B was to use a cut file.  Paige Evans has many cut files with the holes already there for stitching, or use the pen holder in the Silhouette to get it to sketch the design in pencil and I poke the holes myself,  That's almost like not cheating, right?  ๐Ÿ˜‰

Plan Q, R or perhaps S was to put on my Big Girl pants and get on with it.  Sara gave me such encouragement (and I realized I wouldn't be setting the best example by cheating), so a whole white eraser later I decided to start poking holes before I changed my mind. ๐Ÿ’ช

So, what I had in my head was inspired by this layout by Flora Farkas using one of Paige's cut files.  Except I wanted more whimsy...and I promised I'd draw it myself.  You'll see how I take inspiration from Flora's layout without exactly scraplifting it, but it does incorporate at what we looked at in the previous post about scraplifting with this one.  While I'm not exactly scraplifting the layout Sara made in Lesson 1, it's a sort of mix of hers and Flora's and turning out to be unique in its own right. 

I needed both pink and purple so it would draw attention to the colour of the dresses my nieces are wearing in the photos.  The colour is pretty washed out being taken indoors with less than ideal lighting so I wanted to draw attention to it.  The story behind these photos is about their outfits as we watched the royal wedding last year at a high tea my sister organised.

Naturally there are flairs for every possible occasion in the Embellish With Flair shop and this set called Royal Crowns even had the perfect name! ๐Ÿ˜๐Ÿ˜๐Ÿ˜


The background needed to be subtle.  A white tone-on-tone was definitely on the list, but I've always swooned over this subtle yet gorgeous ombre Paper 8 from Paige Evans' "Take Me Away" collection ๐Ÿ˜


It’s at this point where I normally start layering photo mats like crazy.  I wasn’t sure what to do here.  I didn’t want the photo block to look too heavy, but I did need to add my own touches to make it my own.  I don’t usually stack multiple photo mats ups evenly.  It looks really formal and just not “right” for most of my stories.  And another thing - I’m not sure I could stack anything evenly if I tried! ๐Ÿ˜‚๐Ÿคท

๐Ÿ’กTip: You don't have to copy a sketch, scraplift or class lesson down to the last detail.  You want to find the balance between trying something new and still being true to your style.

Since I was trying to keep the photo block reasonably small (not to cover too much of the painstakingly stitched background raiding my box of scraps (when a certain cat isn’t holding them hostage) is a perfect opportunity to pot a small dent in them!

Then I went through my die cuts and stickers and pulled out what I felt qualified as “whimsical”. I found a couple of frames from Paige Evans’ collections.  I struggle to use frames, but this time I was determined.  I backed them with patterned paper as I would a cutfile and they formed a kind of bridge between the paper and the embellishments.  

I love how most of the embellishments are small and paper based (die cuts or fussy cutting or stickers.  It makes them less heavy and more "whimsical".  I only used a single piece of chipboard and tried to keep the non paper elements delicate.

I was trying to be a little restrained there as well since part of the class lesson was to scatter little floaty bits along the stitched areas. I stitched down two butterflies with a cross stitch and attached the tiny metallic butterflies.

The butterflies help make a connection between the metal flair and the more whimsical floaty elements.  As always, Glue Dots is the only thing I use to adhere flair badges and some of the embellies that didn't want to sit nicely on the raised stitching! ๐Ÿ‘

Placement of embellishments was kind of decided for me since there were many areas of the stitched chains of hearts I was unhappy with. 

I put the journal in the space underneath in grey to make it less intrusive.  It’s more legible IRL I promise!  I picked an older set of Thickers by Dear Lizzy (going back to her Polka Dot Party collection) in white (trying to be soft and subtle yet girly at the same time).  Hands up if you have the song from Princess Diaries 2 in your head when you read the title? ๐Ÿ™‹๐Ÿ˜‚


Since I was unable to decide between pearls or diamantes,  I used both!  Plenty of royal jewels mix the two so on they went!  I was in two minds as to whether to add any gold mist.  I know I’ve been doing a lot of it lately, but there is a bit of gold in the die cuts and stickers so I went with it.

Here's my final outcome and I'm not entirely displeased with it!  ๐Ÿ˜‚๐Ÿ‘

It was a labour of love.  I even cut into one of my super special "Love Elsie" papers, and believe me that doesn't happen often!  Besides, it was the only "right" shade of purple among the 37 others I tried ๐Ÿ˜‚๐Ÿคท!

Most importantly,  I achieved my aim by started off with something which looked very different to what I'd normally make, yet I was able to mould it into something that looked like it was my work and included all the things I loved...and all from taking one class!


I do encourage you to try this approach whether it be Sara's class, a different online class or a face-to-face class if you are fortunate enough to be close enough to someone who offers them!

Crowning Glory


 Embellish With Flair products used: Royal Crowns


Giveaway Details - closed!

๐ŸŽจI'm going to give away a spot in Sara's class!!  ๐Ÿ˜
(If you're a cardmaker, I'm going to show you how this class can still be adapted to card making and I promise you'll learn some awesome new techniques!)


๐ŸŽจ The giveaway will remain open until 11:59PM AEST (Australian Eastern Standard Time) on Wednesday 31 July (extended)
If you aren't sure what that is in your timezone, here's a TIMEZONE CALCULATOR
๐ŸŽจ The winner will be drawn on Friday 2 August so PLEASE CHECK BACK HERE!
๐ŸŽจIf the winner and I can't make contact by Friday 16 August, I will have to draw a new winner
๐ŸŽจPlease try to email me at alex@pinkcraftymama.com This really is the easiest way for me to get in touch with you since not all blogger profiles have an email attached and if you JUST leave comments, I have no other place to search for you.

Until the end of July, I'm going to be making stuff (on and off) inspired by this class.  (You'll know the post relates to it because I'll have "GIVEAWAY" in the title and basically shout it from the rooftops!๐Ÿ˜œ)

You will receive ONE entry for each of the following.  You absolutely don't have to do everything - just however many you like, but you need to leave a comment somewhere so we know you want to play along!

So...what do you have to do to get entries?
Follow Alex's blog (in the left sidebar)
Follow Alex on Facebook
Follow Alex on Instagram
Follow Sara on Instagram 
Subscribe to Alex's YouTube
Subscribe to Sara's YouTube 

If you already follow our socials then that bit is done for you!

Comment (once per day per person) on a post related to this giveaway (look out for the pink whimsy graphic) between now and the close of the giveaway :
Alex's Blog post
Alex's Facebook share
Alex's Instagram Post
Alex's YouTube Video

So today...if you want to leave a comment, What do you think of when you hear the word "whimsy"? (or anything else if this doesn't grab you) and please don't hesitate to  email me with any questions at alex@pinkcraftymama.com


Love and Embellish With Flair,

18 June, 2019

TTCRD 18 June DT Project

 Hi Lovelies!

Today is challenge day for Design Team B for the Through The Craft Room Door Challenge.  This is a WEEKLY "anything goes" (any type of project and any theme) challenge with 2 design teams who alternate weeks to make projects showcasing the sponsor who often offers PRIZES!

This week's sponsor is Sheep Ski Designs. You can read a bit about them below.
Prize: 3 Images

 
"Living in Leeds, Yorkshire in the UK, working full time as a Management Accountant, currently working on 2 design teams and an obsessive crafter and creator of cards. I have no actual style as yet but do love the unusual and quirky. I may be known for producing cards in soft pastel colours.
I love anything arty. I've always drawn stuff, for as long as I can remember. In my younger days I sold a few watercolour paintings. I recently found mixed media which is a joy and love creating canvases with flowers.
I had a battle with digital drawing for about a year and finally found some software I could gel with. January 2016 a challenge team I worked on was short of a designer's images to create with so I drew some. I opened my shop a month later so I could sponsor challenges and give something back to the crafting world, to the lovely ladies who have supported me on my journey.
I've a Facebook group SheepSki Designs where I hold challenges, some for fun to win digis as well as my monthly card challenge. I've a SheepSki Designs challenge blog as well. Things are growing slowly (thankfully) so I still manage to spend at least a little time with my hubby
Welcome to my world"

Well...I'm not really sure where to start with this one!  You know my reputation for something always going wrong?


This time it was a total disaster!  I'm not just being overly dramatic either!  I mean having an unusable card when you're already running a bit behind schedule to submit it for the Design Team post!

It's a good thing this Pink Crafty Mama thrives on adrenaline!  Well this is what happened:

I decided I wanted to work with this cat image by our sponsor.  I suspected it wouldn't be the easiest to colour with Copics, but I already did a watercolour cat card so I wanted to mix it up (says she who is always making cat cards -  KNOW! ๐Ÿคฆ).  The lines were really simple and I wasn't sure I was up for making a galaxy background with Copic markers, although I could definitely do it with Distress Ink.

All I have to do is mask the coloured images then do the galaxy sky the usual way.  I wanted to practice colouring different kinds of cat coats and I even managed to get a darkish lilac type of coat coloured!  Darker was OK because it's night after all.

This guy is grey and white rather than lilac, but you can see what drew me to the image with the cats on the roof!


After everything but the sky was coloured, I stick down my sheet with Removable Glue Dots and applied masking fluid...

BIG MISTAKE!!!

I should have done a test patch, but I felt so confident at this point (I really should have known better, since nothing really went wrong so far) and even liked my colouring and everything!

Xpress-It Blending Card is generally more delicate than other paper.  Not only did the masking fluid seem to "suck" a fair amount of colour out of my images, but it tore in some areas.  I was devastated!  I also had a deadline!


OK, Big girl pants on and time to Plan B.

Let's paper piece it.  I don't even need to choose paper with realistic textures although I did for the sky with the amazing Altenew Celestial paper pad.  Those galaxy skies are amazing!  I also used a Kaisercraft Australian paper  for the roof since it had rusty corrugated iron texture.

A grey polkadot and brown cork for the cats and I traced the moon shape onto an actual moon from Shimelle's Starshine paper pad to try giving it a bit of that texture.  You do need to know how ro ajust your printer tray to accomodate different sized apers (I used 6x6) and also adjusted it in my software so I could see how the image fit on the paper.

Naturally I couldn't resist the lure of clear Wink of Stella lightly brushed over the moon before adding the sentiment on foam squares.

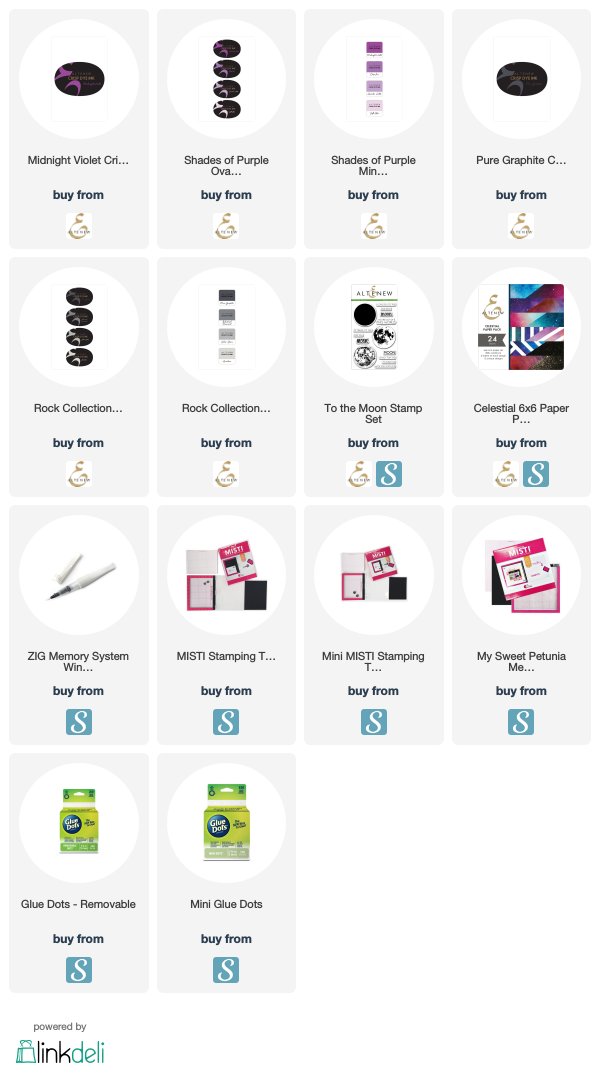
The sentiment was stamped using Altenew's To The Moon stamp set in Midnight Violet and Pure Graphite Crisp InksMicro Glue Dots were the ONLY thing that would hold the tiny stars to the slightly shiny background paper.

Surprisingly, it turned out better than  although, although far from what I had in mind.

I Love You to the Moon and Back Cat Card


So naturally it makes me wonder how could I have made my original plan work.  My first thought was using masking sheets.  But it's a digi stamp so there is no way I can put one of those through the printer.

I suppose using a template cut from images printed on paper or light cardstock then using them to trace around onto the sheets could work, but DEFINITELY TEST FIRST!

Using an alternative paper was another possibility.  Many people use Neenah Solar While for Copic colouring. I have it in the 110lb weight and it's definitely too thick for my printer.  I'm waiting for the 80lb to be restocked in A4 size.  Again, before assuming masking with anything will work with Neenah, DO A TEST FIRST!

I always like to revisit any project which has not turned out the way I wanted and this will be no exception.  Kind of like not wanting to be beaten by paper! ๐Ÿ™ˆ๐Ÿ˜‚

SUPPLIES:

The products I used (or similar) are listed below:
This post may contain affiliate links.  By clicking on the items or making a purchase (at NO additional cost to you) you help support this site, so a big, pink THANK YOU
Please rest assured I only recommend products I personally love!

Love and minimal mistakes,


04 June, 2019

TTCRD 4 June DT Project

 Hi Lovelies!

Today is challenge day for Design Team B for the Through The Craft Room Door Challenge.  This is a WEEKLY "anything goes" (any type of project and any theme) challenge with 2 design teams who alternate weeks to make projects showcasing the sponsor who often offers PRIZES!

This week's sponsor is Newton's Nook Designs. You can read a bit about them below.
Prize: PRIZE $20 Gift Certificate to store

 
Newton's Nook Designs is made up of a husband and wife team located in Southern Wisconsin. Their goal is to provide you with unique and whimsical stamp designs and products that are fun to use and make you smile! Jen illustrates and designs all of the products and Jeff does the behind the scenes essentials! Their company is named after Newton, their sweet orange tabby cat, who is also the inspiration for their adorable cat themed designs!


This was one I was super excited to do since I have always loved Newton's Nook!

I used one of their newest stamp sets called Newton Cleans Up to make a somewhat unconventional Get Well card.

As soon as I saw that vacuum cleaner I wanted to try to make a shaker from it.  It reminded me of the reason NotPinkCraftyHubster bought a vac with a large clear barrel - so he could carefully identify and retrieve Lego which got sucked up.

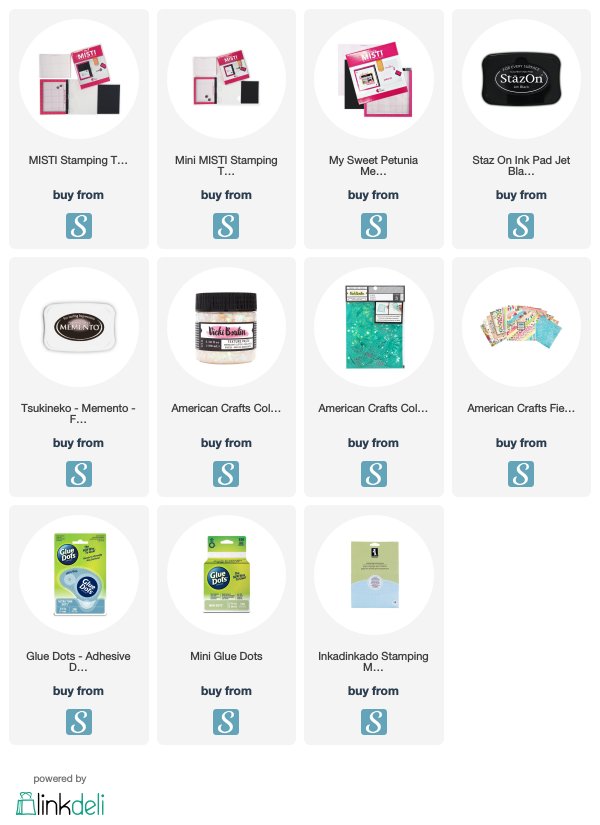
I stamped it on my card front, masked it and then applied some Vicki Boutin Iridescent paste through a stencil as a bit of an experiment and I'm happy with how it came out.  I knew it would tie in wit the sparkly mix in the shaker.

I'm less than enthused by my Copic colouring.  To be quite frank, it SUCKS! ๐Ÿคฃ๐Ÿคฃ๐Ÿคฃ.  The cat itself is OK, but the purple wasn't blending properly.  After it dried, I came back and touched it up which is a minor improvement.

My other issue was that my initial snarky thought of "You Suck" (with an optional "just kitten"!) was probably not going to be appreciated by anyone not quite as snarky so I decided on a get well type of sentiment.

It occurred to me that sick cats probably wouldn't be doing the vacuuming, so I added props from "Newton's Sick Day" stamp set.  I then proceeded to cut apart the birthday sentiment since I knew I'd never use it as is and used the "Not Feeling Well" from "Naughty Newton".  The similar one from "Newton's Sick Day" just didn't look right after I stamped it.


Well here is the finished product and I hope you visit us at TTCRD to play along and win the prize!

Not Feeling Well Cat Card


And here's the slightly improved colouring:


PS I thought you might like to see what happened as soon as I opened the pot of iridescent paste 9see the lid right there?).  That cat has a radar for any wet media,  Let's not even discuss the incident involving white Distress Paint! ๐Ÿ˜–๐Ÿ˜–๐Ÿ˜–


SUPPLIES:

The products I used (or similar) are listed below:
This post may contain affiliate links.  By clicking on the items or making a purchase (at NO additional cost to you) you help support this site, so a big, pink THANK YOU
Please rest assured I only recommend products I personally love!


Love and crazy colouring!


02 June, 2019

Design Team Post for Embellish With Flair (31 May)

Hello Lovelies!

I'm here with the next installment of my Lost Mojo (or Finding Inspiration) series that I've been writing for the Embellish With Flair blog!  If you missed the first installments, you can find them here:
Part 1
Part 2

So what are we going to discuss today? I honestly didn't expect this to become quite the epic it has, but I'm hoping you're enjoying it (or at least the lovely flair on my layouts ๐Ÿ˜‰)

This is the bit when I think it's worth talking a bit about finding inspiration from OTHER PEOPLE.  I guess you'd say it's like pulling out the big guns if you're really stuck, or perhaps you always do this and there's nothing wrong with that.  There is one golden rule as far as I'm concerned, though and that it to always acknowledge your source or inspiration.

There are various ways you can be inspired by other crafters - using a sketch created by someone else, "scraplifting" a finished layout or perhaps taking a class offered by another crafter.  I regularly use all three methods.

Sometimes, my chronic illness doesn't allow me to do the entire process so through trial and error I found that when I need to buy some time or energy, taking this first step out of the equation for me is key to having a finished layout and story told.


Today we'll have a look at scraplifting.  What's "scraplifting" I hear you ask?  While I dislike the term (it implies stealing), it's effectively copying someone else's project.  We're taught that's a big NoNo at school, but that's why people share their work online.  When you find a layout by another scrapbooker that you'd like to reproduce, or get inspiration from, there are endless degrees to which you can do this.

The layout I'm scraplifting is by Shimelle Laine.  Her "style" is pretty close to mine so I often am inspired by her work.  The layout I'm "scraplifting" is a few years old and can be found HERE.  I really recommend you have a look at it first.

Now I could reproduce this layout exactly if I wanted to since I have all the exact same supplies in my stash (I know! ๐Ÿคฆ).  I've never done this though!  Not that her layout isn't perfect as it is, but I personally don't want mine to be a cookie cutter replica.  Where's the creativity?  Talking about creativity may seem like a luxury when your mojo is MIA, but I promise, once you get going you will see that your page starts to develop a mind of its own even if it's a pretty close scraplift.

I'd call mine pretty close.  I guess for me it is since I know how far (or not) I end up when I do this.  There are loads of examples on my blog.  If you click on the word "scraplifting" at the bottom of a post on my blog when I use it (like this one), it will bring up more entries.

You might deviate a lot more (and I have a layout in progress where my scraplift took on a mind of it's own which I will post when I revisit this topic later) or a lot less.  Both are absolutely OK!

So where to start?  The easiest way to stay true to the original is to choose a photo which is roughly the same size and orientation.  In this case it appears to be 4x6 in landscape.  Mine is a touch smaller.  The next thing is to pick supplies, but I do find that when scraplifting, the layout does tend to evolve so it's never quite that simple.

My process for this exercise was to first decide on my background paper.  I did toy with navy, but if I was going to use the black and white "Cats" flair badges I'd have to include at least some black which can be a challenge with navy, though not impossible.  I ended up choosing a dark grey which bridged the gap between black and the colour of the grey cat.  I also wanted the focus to be more on the colours of the box.


If you read Shimelle's blog post and journaling, you'll see that rainbow and colour overall play a key aspect in her story, whereas in mine, the story is about the box in the photo, so emphasizing those specific colours made sense, but I did want to include somewhat of an array of bright colour (especially red of the box (and to a lesser extent blue)).

Since my photo had far fewer colours than Shimelle's, and that initial pop of rainbow is what makes the dark background so striking, I did want to include some multicoloured paper with black (OK so it could be a very very dark navy in the triangle pattern but reads as black) as well as incorporating all the other colours I planned to use.

I also ended up having to use more layers because it just didn't look "right" with fewer.

This is what I mean when I say the layout starts taking on a life of its own!  I had to go back and search for various colours and add them in a few times!

As you can tell, I deliberately curled up loose corners for texture!

I was also thinking embellishment at the same time.  I did want to use that same "delighted" die cut since it's a word frequently used in Regency society and had all the colours I was going to use!

I wanted to use stitching like Shimelle, although mine was more for decorative purposes (except in a couple of places) rather than holding down notorious chipboard!  I like leaving loose threads if it suits the layout and anything to do with cats suits since they like string and yarn.


I wanted to use some gold also as a nod to the Regency era, so gold mist and gold detail on some of the embellishments worked with the Thickers.  Also...if you're going to stitch, make sure said mist is totally dry or else you'll have to cover up the smudges with the chipboard and enamel stars!! ๐Ÿคฆ๐Ÿคฆ๐Ÿคฆ

I positioned the badges around the photo and picked mostly white ones to stand out.  I did have to use the one with a touch of red to again go back to the original chicken box element of the story!  Also, my son calls him "little man" so that sticker on the top left was perfect in all aspects.

I'm sure you can figure out the connection between cats and birds/feathers.  It's one of the few times I use bird paper since I have a phobia and aversion to the things and quite frankly the connection freaks me out further, but ๐Ÿคท.  Shimelle jokes that I'm the only one allowed to disike the birds she has included in her last few collections! ๐Ÿ˜ณ๐Ÿ˜ณ๐Ÿ˜ณ

Most people wont have any idea that all these little decisions relate to the story and my memory of the event, but I love all these little connections and they really make the memory complete in my mind.

Speaking of story...that cat is named Fitzwilliam (after the heartthrob hero), and there is also a character in the novel called Colonel Fitzwilliam!  Not who he was named after, but a good pun in light of the story being about the box!


So can you see how while I have scraplifted a layout, I've also used elements from the Part 1 and Part 2 of this series as well to help make the layout my own and just let the initial inspiration take me where it was going to lead.

Colonel Fitzwilliam


Well thanks for sticking with me and hope to bring you another way to find that lost mojo very soon!

Embellish With Flair products used: Cats set


Love, and Embellish With Flair!